

How to Lift Droopy Jowls and Cheeks Naturally in Just 5 Minutes—No Tools Required
We’ve all had those moments when we look in the mirror and wish our jowls weren’t sagging, or our cheeks had a little more lift. But here’s the thing—who says we need expensive tools or invasive procedures to reclaim a youthful, glowing face? In just 5 minutes, you can sculpt and lift your face with nothing but your hands and your favorite serum or oil. That’s right, no fancy gadgets or costly treatments needed.
This simple routine targets those drooping jowls, tired cheeks, and even tired eyes—all while releasing tension in your fascia and boosting your skin's natural glow. It’s about working with your body, not against it. Ready to see the difference? Let’s dive in.
Why Fascia Health Matters: The Secret to Lifting Your Face
Let’s talk fascia. Fascia is the connective tissue that supports and shapes your face. When fascia gets tight or restricted, it can pull everything downward, leaving us with droopy jowls, tired eyes, and a dull complexion. By releasing this tension, you’re not just lifting your face—you’re activating your body’s natural healing processes, increasing circulation, and encouraging collagen production for skin that glows.
In this routine, we’ll focus on fascia release—this is what will give your face the lift it craves and restore that youthful vibrancy.
Stay with me till the end—I have a special video for you with my full jowl-lifting routine!
Step-by-Step Routine: Sculpt and Lift Your Face in 5 Minutes
Step 1: Prep Your Skin for Success
Start with a generous layer of your favorite serum or oil. This will help your hands glide smoothly across your skin, allowing you to work through the fascia tension. If you’re in the shower, try an oil-based cleanser for that same silky feel.
Step 2: Activate Your Lymphatic System for Natural Detox
Before diving into the lifting techniques, we want to activate your lymphatic system to flush out toxins:
Tap gently 10 times near your clavicle (collarbone).
Tap 10 times behind your ears.
This helps to clear any stagnant energy and prepares your face for a deep lift.
Step 3: Release Tension in the Neck and Jawline
Your neck is the foundation of your face, so let’s release any tension here first. You’ll feel the difference immediately!
Neck Strokes: Using the back of your knuckles, gently glide up the front of your neck. Focus on the sides and center, working through any tension.
Side of the Neck: Use your knuckles to massage down the sternocleidomastoid (that large muscle along the side of your neck). Bring any tension down to the clavicle.
Back of the Neck: Gently glide your knuckles along the occipital ridge (the base of your skull) down to the traps. Finish by bringing any toxins to the lymph nodes near your clavicle. It’s all about flushing out the tension and prepping your muscles for the next steps.
Step 4: Sculpt and Lift Your Cheeks—Naturally
Now, let’s focus on lifting those cheeks and jawline!
Cheek Lift: Use the back of your knuckles to scoop under your jawline and gently lift towards your cheeks. This will start the lift right where it counts.
Cheekbone Contouring: Glide under your cheekbones, moving outwards toward your ears. This helps sculpt and define your cheeks, leaving them looking lifted and fresh.
Step 5: Open Up Your Eyes with Facial Release Techniques
Tired eyes? I’ve got you.
Eyebrow Lift: With your knuckles, glide along your brow bone from the inner corner outward. Focus on lifting the outer corners of your eyebrows for a more open, awake look.
Under-Eye Release: Lightly glide your knuckles under your eyes. Avoid dragging the skin—this is about gentle, mindful pressure to release any puffiness and bring the glow back.
Step 6: Strengthen Your Forehead and Facial Muscles
Want to give your forehead and face a little extra boost? This is where the strengthening magic happens.
Forehead Massage: Use small, circular motions with your knuckles across your forehead. This increases blood flow and encourages collagen production.
Facial Strengthening: Perform controlled cheek movements to flex the muscles without creating wrinkles. Also, try a quick “kitty-cat squint” to strengthen the muscles under your eyes and boost that bright-eyed look.
Step 7: Finish with Lymphatic Drainage
Let’s wrap this up by promoting lymphatic drainage and flushing out the toxins we’ve released throughout the process.
Gently lift your skin upwards from your face to your ears.
Sweep down behind your ears to your clavicle.
This will leave you feeling fresh, rejuvenated, and glowing. Trust me, your skin will thank you.
Pro Tips for Maximum Results
Consistency is Key: Perform this routine daily for the best results. It’s the perfect way to embrace natural beauty in just minutes a day.
Focus on Tension: If you’re short on time, just target the areas where you feel the most tension—your jawline, cheeks, or under-eye area.
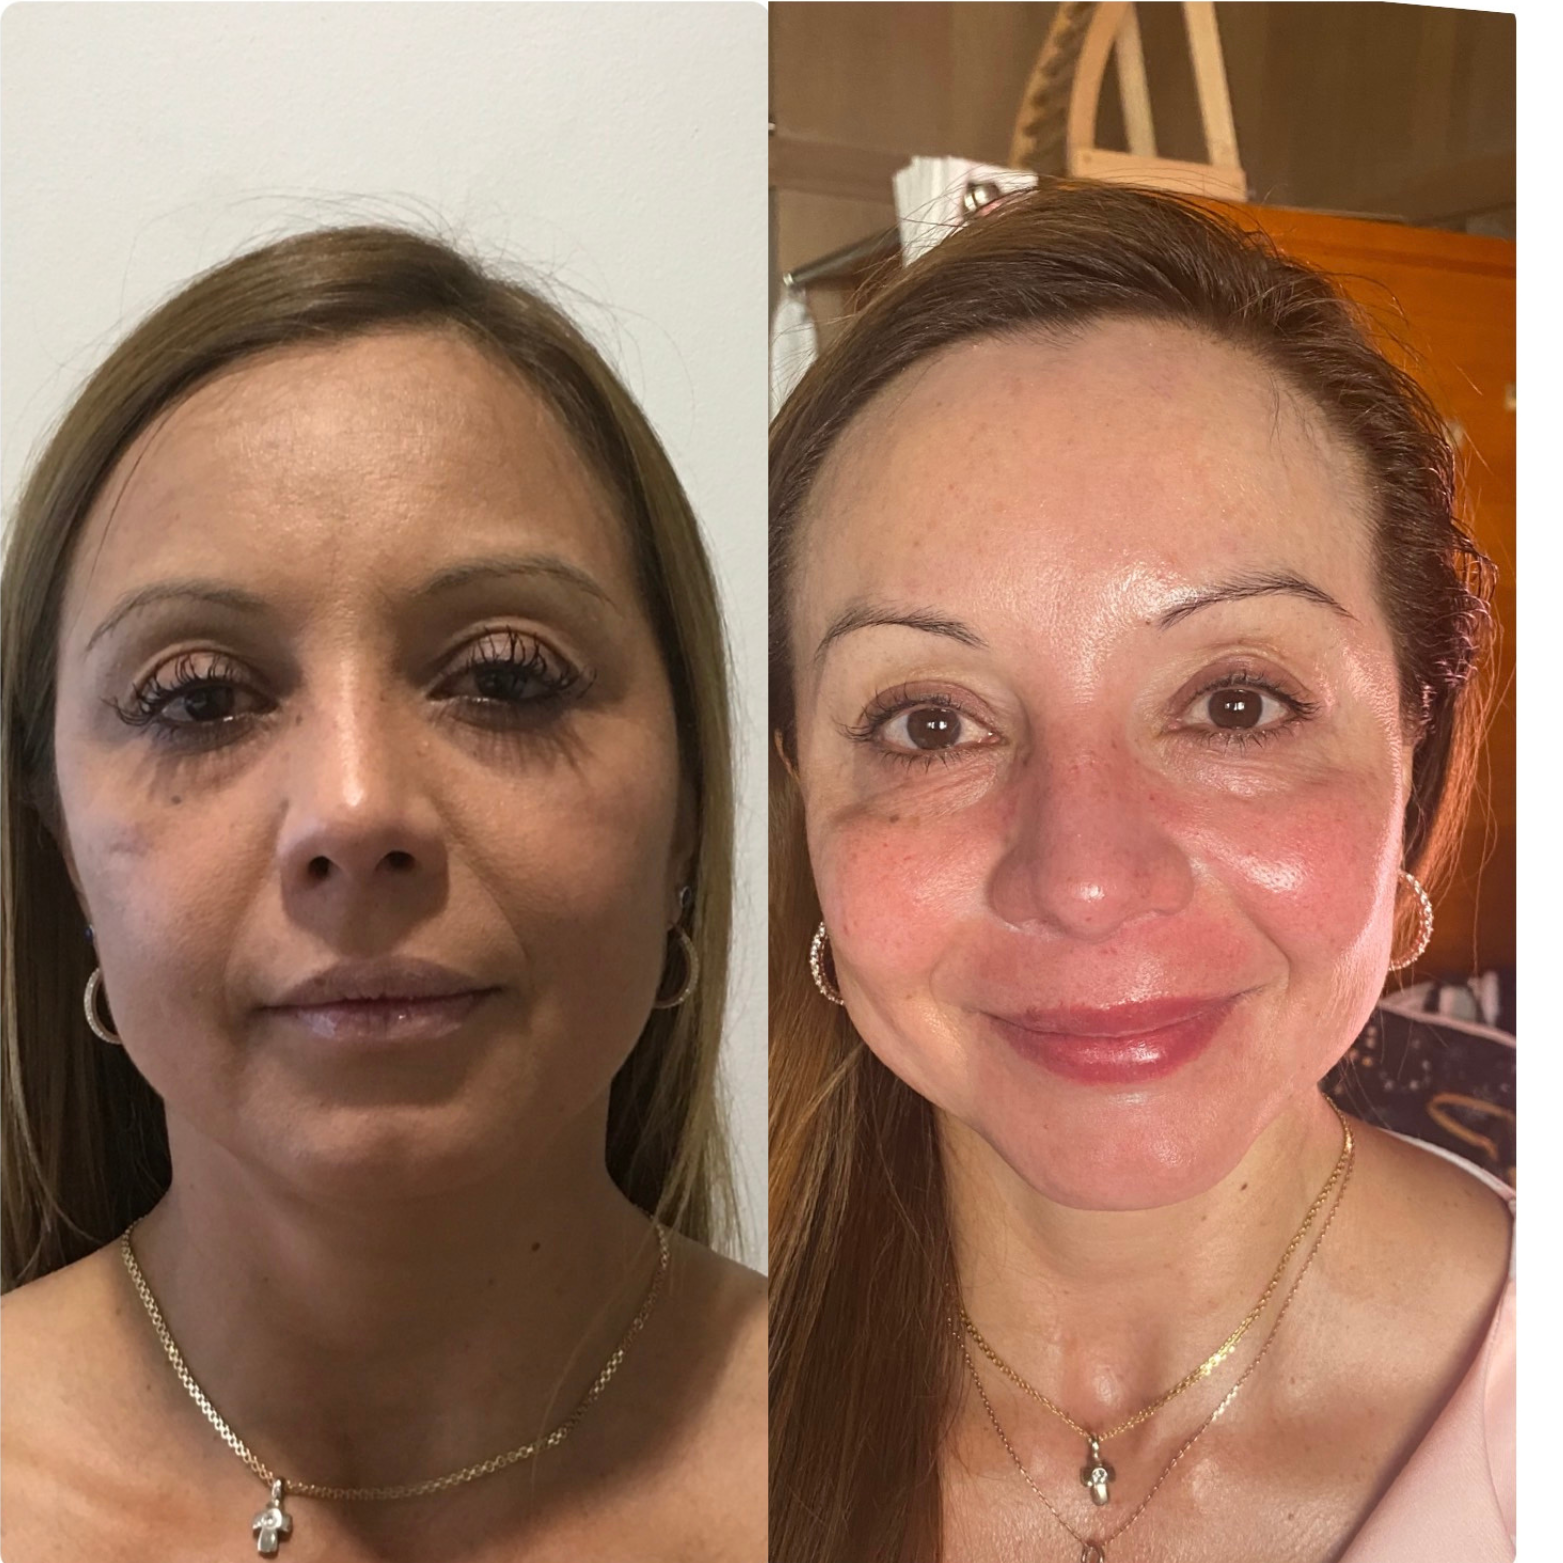
Track Your Progress: Take a before-and-after photo to see the visible lift and glow in your skin over time. The results speak for themselves!
This routine is all about effortless beauty—no tools, no surgery, just you and your body working in harmony. Fascia health isn’t just about looking better; it’s about feeling better, too. Follow these steps daily, and you’ll not only notice a natural lift but also feel more connected to your skin and body.
Remember: Everything is connected to fascia, and once you unlock its potential, your skin will reflect that. Let’s keep moving, looking, and feeling free!